
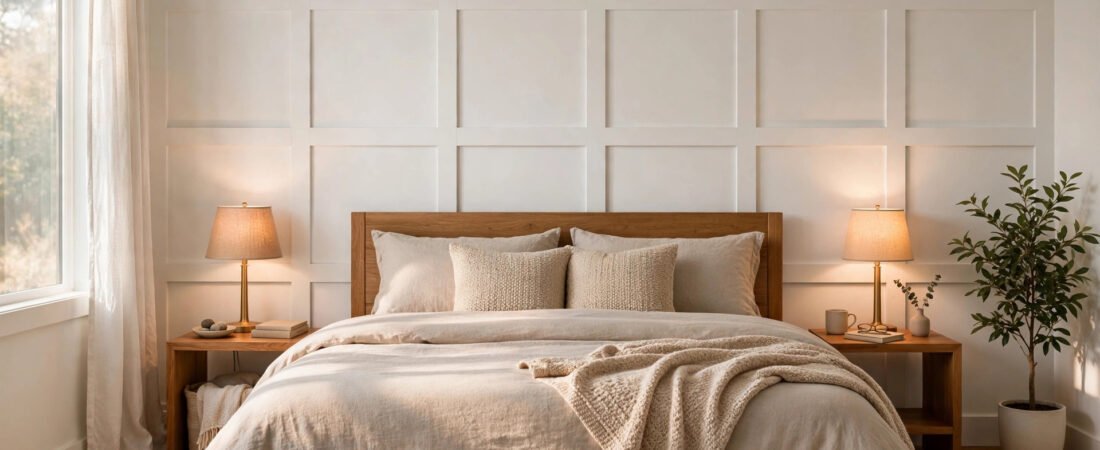
Adding a DIY board and batten wall is one of the easiest ways to give a plain room instant character. With nothing more than some affordable timber boards, a nail gun, and a weekend afternoon, you can turn a flat, forgettable wall into a textured accent feature that looks like it was done by a professional. In this guide, you’ll learn exactly how to plan, build, and finish your own board and batten wall — even if you’ve never touched a power tool before.
What Is a Board and Batten Wall?
Board and batten is a classic wall treatment made from flat boards (the “boards”) with narrow vertical strips of timber (the “battens”) laid over them in a grid pattern. Traditionally used on the outside of barns and farmhouses, it has become a beloved interior accent for living rooms, bedrooms, hallways, and dining rooms.
The beauty of a DIY board and batten wall is its simplicity. Unlike shiplap or tongue-and-groove panelling, you’re not covering the whole wall with timber — you’re simply adding a grid of thin boards directly onto your existing drywall, then painting everything one colour. The result is depth, shadow lines, and architectural interest for a fraction of the cost of real wainscoting.
How Much Does a DIY Board and Batten Wall Cost?
One of the biggest draws of this project is the price. For a standard 3-metre (10-foot) accent wall, most DIYers spend between $80 and $150 on materials. Pre-primed MDF boards are the budget-friendly favourite — a 1×4 MDF board (2.4 m / 8 ft) typically costs just a few dollars at any home improvement store. Add paintable caulk, wood filler, and a tin of paint you may already own, and the project stays firmly in budget-decor territory.
Compare that to hiring a carpenter, which can easily run $500–$1,000 for the same wall, and the savings speak for themselves. If you already own a brad nailer, your only real expense is timber and paint.
Tools and Materials You’ll Need
Before you start, gather everything so you’re not making mid-project trips to the store.
Materials
- 1×4 pre-primed MDF or pine boards (measure your wall first — see the spacing guide below)
- 1×2 board for the top ledge trim (optional but gives a lovely finished cap)
- Construction adhesive or wood glue
- 1¼-inch brad nails
- Paintable caulk
- Lightweight wood filler or spackle
- Primer (skip if boards are pre-primed)
- Interior wall paint in your chosen colour — satin or eggshell finish works best
Tools
- Brad nailer (or hammer and finishing nails)
- Mitre saw or circular saw for cutting boards
- Tape measure and pencil
- Spirit level (a long one is worth its weight in gold here)
- Stud finder
- Caulking gun
- 120-grit sandpaper
- Paint roller, tray, and angled brush
- Safety goggles and dust mask
If this is your first power-tool project, you’ll find our DIY floating shelves tutorial is another gentle introduction to cutting and mounting timber — many of the same skills transfer directly.
Step-by-Step: How to Build Your DIY Board and Batten Wall
Step 1: Plan Your Layout and Measure the Wall
Start by measuring the full width and height of your wall. Decide how tall you want the treatment: a full floor-to-ceiling grid looks modern and dramatic, while a chair-rail height (about 90–120 cm / 36–48 in from the floor) feels classic and cosy. For your first project, a half wall is more forgiving because there are fewer long cuts.
Next, plan your batten spacing. Vertical battens typically sit 30–45 cm (12–18 in) apart. Measure the wall width, subtract the total width of your boards, and divide the remaining space into equal gaps. A quick trick: mark the batten positions on the wall with painter’s tape first so you can step back and eyeball the rhythm before committing. Getting the spacing right matters — the same measuring discipline applies when you work out exact curtain hanging heights, where a few centimetres make or break the look.
Step 2: Prep the Wall
Remove outlet covers, switch plates, and anything hanging on the wall. Fill old nail holes with spackle, let it dry, and sand smooth. Wipe the wall down with a damp cloth to remove dust. If your final colour differs from the wall’s current colour, paint the wall now in your chosen shade — it’s far easier than cutting in around dozens of battens later.
Step 3: Install the Horizontal Rails
Start with the horizontal boards: the baseboard (or a new 1×4 if you’re replacing the skirting), the top rail, and any middle rail for half-wall designs. Use your stud finder to mark studs, apply a zigzag of construction adhesive to the back of each board, press it level against the wall, and secure with brad nails into the studs every 30–40 cm. Work from the centre outward and check level constantly.
Step 4: Attach the Vertical Battens
Cut each vertical batten to fit between your horizontal rails — measure each one individually, because walls and skirting are rarely perfectly straight. Apply adhesive to the back, press the batten into place along your tape marks, confirm it’s plumb with your level, and nail it home. Aim for studs where they line up; where they don’t, adhesive plus nails into the drywall is plenty for lightweight MDF.
Step 5: Fill, Caulk, and Sand
This step separates amateur results from professional ones. Fill every nail hole with wood filler and let it dry completely. Run a thin bead of paintable caulk along every seam where timber meets wall, and where battens meet rails. Smooth the caulk with a damp finger for crisp lines. Once everything is dry, lightly sand the filler spots with 120-grit paper.
Step 6: Prime and Paint
If your boards aren’t pre-primed, apply one coat of primer to seal the MDF edges (MDF drinks paint, so don’t skip this). Then apply two coats of your chosen wall paint with a roller, using an angled brush to cut into the corners and edges. Painting the whole wall one colour — battens and all — is what makes the grid look built-in rather than stuck-on. For more painting confidence, our guide to painting kitchen cabinets without sanding covers the same prep-and-finish principles on a trickier surface.
Board and Batten Spacing: The Simple Math
Uneven spacing is the most common beginner mistake. Here’s a foolproof formula:
- Measure the wall width in centimetres (e.g. 300 cm).
- Decide your target gap — 40 cm is a safe, attractive default.
- Divide: 300 ÷ 40 = 7.5, so round to 7 or 8 vertical battens.
- Recalculate the exact gap: (300 − total board widths) ÷ number of gaps.
Always start from the centre of the wall and work outward — this keeps any slightly narrower end gaps symmetrical instead of lopsided.
Pro Tips for a Flawless Finish
- Use MDF, not solid pine, for painted projects — it’s cheaper, perfectly straight, and won’t warp.
- Caulk is magic. Generous, neatly smoothed caulk hides every imperfect cut. Tutorials like Angela Marie Made’s board and batten guide show just how much the caulking stage transforms the final look.
- Paint the wall first in your final colour before attaching battens — it saves hours of fiddly brushwork.
- Cope with outlets: mark outlet positions on your battens and cut notches with a jigsaw or coping saw rather than trying to work around them.
- Light it well: an accent wall deserves good lighting. Swapping to warm white LED bulbs makes painted panelling glow beautifully in the evening.
Renting? Try This Damage-Free Alternative
Nails and adhesive aren’t renter-friendly, but you can fake the panelled look with peel-and-stick wallpaper in a board-and-batten or panel-moulding print. From a few steps back, the effect is surprisingly convincing — and it peels off cleanly when you move out.
Frequently Asked Questions
How much does a DIY board and batten wall cost?
For a standard 3-metre accent wall, expect to spend $80–$150 on MDF boards, caulk, filler, and paint. The biggest variable is whether you already own a brad nailer and saw.
Do I need to remove my baseboards first?
Not necessarily. Many DIYers simply butt the vertical battens on top of the existing skirting board. For the cleanest look, you can replace the skirting with a taller 1×4 board that matches your battens, as shown in Willy Homes’ step-by-step board and batten tutorial.
Can beginners really do this project?
Yes — it’s widely considered one of the most beginner-friendly carpentry projects. The cuts are all straight, the math is simple division, and caulk plus paint forgive nearly every mistake.
Should I use MDF or real wood?
For painted walls, MDF is the better choice: cheaper, straighter, and more stable. Choose pine or poplar only if you plan to stain the timber and show the wood grain.
How long does a board and batten wall take?
A single accent wall typically takes one full day: a few hours for measuring and cutting, a couple of hours for installation, then filling, caulking, and painting (with drying time between coats).
Does board and batten make a room look smaller?
Done in a light colour, it usually makes a room feel more finished rather than smaller. Dark colours add drama but can visually shrink a small room — in that case, consider a half-wall treatment instead of floor-to-ceiling.
Conclusion
A DIY board and batten wall delivers one of the highest style-per-pound returns of any home project. For under $150 and a single weekend, you get custom-looking millwork that elevates bedrooms, living rooms, hallways, and entryways alike. Measure carefully, caulk generously, and paint boldly — then step back and enjoy the wall everyone assumes you hired a carpenter to build.